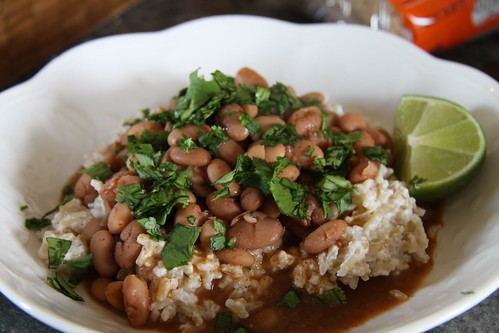
Panamanian Pinto Beans with Ham and Rice with Coconut Milk
note: this recipe is vegetarian, better yet, vegan if made without the pork.
My friend Becca wrote that she was making this for dinner last week on good ole Facebook. I wrote back something like"Um...YUM! I need the recipe". She was good enough to oblige and now I have a solid introduction to Panama cuisine that I can share with you guys!
Becca got this recipe from her Au Pair a few years back. She was Panamanian and it is a staple out there. The kind of food you make over and over through the generations..."no big deal" food, which is my favorite, especially when it's ethnic. She says it's usually served with these small red beans which we can't get in the states (or not that she knows of anyway) so she uses pinto beans. When you cook the rice with the coconut milk it get's thicker, not unlike rice pudding. Glorious things happen in this bowl!
Panamanian Pinto Beans with Ham and Rice with Coconut Milk
serves 4-5
1 package dried pinto beans
2 cups brown or white rice (or whatever you need to serve 4)
1 can coconut milk
sea salt
1 package of salt pork or ham hock (you can skip this and make it vegetarian)
2 garlic cloves, smashed
1 bay leaf
1 1/2 tbsp chili powder
1 teaspoon garlic salt
2 teaspoons garlic powder
1 teaspoon cumin
Sea salt, to taste (about 2-3 teaspoons, at least)
a few handfuls of cilantro, chopped
lime wedges for squeezing over top
For the rice:
Make rice according to package instructions substituting 1 can of coconut milk for part of the amount of water called for and adding 1 teaspoon of sea salt. (I made 2 cups of rice. The coconut milk measured out to about 1 1/2 cups and I filled the rest of the liquid called for with water. (I needed to add more water towards the end because my rice was not cooked through and all the liquid was absorbed. My pot boiled over twice though, so, If need be, you can do that too.)
For the beans:
Place a bag of dried pinto beans in a large stockpot with enough water to cover the beans by 2-3 inches. Place the pot on a stove and bring to a boil. Turn the heat down, place the lid on and take off the heat. Let it sit for 1 1/2 hours. Alternately, you can soak the beans overnight in room temperature water before using.
Drain the beans, then fill the pot with enough fresh water to cover the beans by two and a half inches if using a wide large pot, three inches if using a smaller to medium sized pot. The beans will soak up more water and also evaporate some during the cooking process. Add the salt pork, bay leaf and 2 garlic cloves. (It is very important not to add salt to the beans until they have cooked through. It will make them tough). Simmer, covered all day (5-7 hours) until tender. Remove and discard the pork. At this point, the beans should be swimming in the water with maybe about a 1/2" of water covering them (less than that is okay). If you have more, remove some of the water. Add the chili powder, garlic salt, garlic powder, cumin, sea salt to taste, and stir. Taste the broth and adjust seasonings as necessary. It will probably need more salt. Let the beans simmer with the newly added spices for five minutes. Taste and adjust seasoning as necessary (important to taste since you will have varying amounts of water in your pot to season).
Serve beans with a bit of their juices on top of the coconut rice and top with a generous amount of cilantro and fresh lime juice.
This is a meal within itself. I wrote the recipe with the amounts of spices I used when making this. Becca's original directions were much more relaxed. It sounded something like this: you just replace the water for the rice with a can of coconut milk, adding more water if you have to make whatever amount of liquid necessary. You will want to add sea salt. I cook the beans on the stove all day long and season them well with chili powder, cumin, and fresh garlic and serve the beans over the rice with fresh squeezed lime and cilantro.
My point in saying that is if you are comfortable, take Becca's directions and wing it. I am more comfortable following directions so that is why I included measurements here.

